Configuring Neovim 0.11 LSP from scratch
With the release of Neovim 0.11 in March 2025, it now includes full LSP support, requiring only that:
- A Language Server is available on the host
- The respective LSP client is enabled (and optionally configured)
This makes it much easier to configure LSP clients, without the need for any extra plugins – although some might still be useful.
Since a lot of people, me included, have been using LSP on Neovim through plugins and custom configurations, it makes it hard to write a one-size-fits-all migration, so instead, let’s dig into how to configure the new features from scratch, on a clean installation. This method will provide a bare-bones configuration that can be used to migrate from whatever plugins you have in a more understandable way.
What is a Language Server?
The Language Server Protocol (LSP) is an open, JSON-RPC-based protocol for use between source code editors or integrated development environments (IDEs) and servers that provide “language intelligence tools”: programming language-specific features like code completion, syntax highlighting and marking of warnings and errors, as well as refactoring routines. The goal of the protocol is to allow programming language support to be implemented and distributed independently of any given editor or IDE. In the early 2020s, LSP quickly became a “norm” for language intelligence tools providers. – Language Server Protocol @ Wikipedia
Before LSP became popular, every editor or IDE had to implement its own language features, including autocomplete and documentation, either natively or by plugins. Because of this, deciding on an editor was much more a choice based on the languages it supported than just a personal preference.
Microsoft first created the Language Server Protocol for Visual Studio Code, and in June 2016 announced a collaboration with Red Hat and Codenvy to standardize the protocol’s specification. After that, several other editors adopted LSP, including Neovim (starting in version 0.5).
How LSP works
- A Language Server runs on a separate process, independent of the editor. This server is responsible for parsing and interpreting a source code file or tree and producing information about it.
- A tool – usually an editor or IDE – communicates with the server using JSON-RPC, sending messages to ask for autocomplete, diagnostics, definition, etc., and receives a response from the server with the relevant information about the code.
Below is an example for how a tool and a language server communicate during a routine editing session:
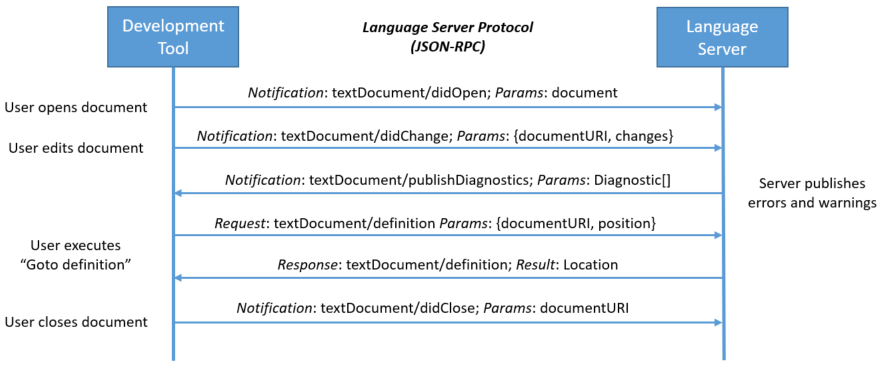
Of course, the language server must have been installed first, but this can be handled automatically by editor plugins. Some popular Language Servers are typescript-language-server (Typescript/JavaScript), solargraph (Ruby), rust-analyzer (Rust), and pyright(Python), just to mention a few. Once installed, the editor or plugin will start the server on demand.
More details on how LSP works can be found in the LSP overview page.
LSP on Neovim
A brief history
Before LSP features were introduced in Neovim 0.5, users would have to rely on plugins for that. Two excellent options were Conquer of Completion and ALE (which also supports Vim). These plugins had their own completion/diagnostics implementation and also included LSP features when they became popular. Both still work today, being used by a lot of people.
When Neovim introduced basic LSP features in 0.5.0, integration with Language Servers became much easier, requiring just configuration to be used. These configurations were usually managed by the nvim-lspconfig plugin, which until its version 2.0.0 was the standard way to configure LSP Clients on Neovim. – I myself have migrated from ALE, which I used to have in Vim, to the built-in LSP using nvim-lspconfig some years ago.
The built-in LSP evolved over time, adding more features and fixing issues, until finally in version 0.11 it is fully supported, not requiring any extra plugins. Although nvim-lspconfig can still be used to provide standard configurations for various language servers, as we can read in their README:
nvim-lspconfig is a “data only” repo, providing basic, default Nvim LSP client configurations for various LSP servers.
Step-by-step configuration using Neovim 0.11
To configure Neovim LSP from scratch, we will be using a clean installation.
To allow experimenting without affecting existing configurations you can use a different config file (
nvim -u ~/.config/nvim-alternative.lua) or run from a docker container (docker run --rm -it archlinux bash).
1. Install Neovim and any desired language servers
First we need to install neovim (if you haven’t yet) and the desired language servers. I’ll use typescript-language-server for the following examples.
1
2
3
4
5
6
# install on Arch Linux
# check the command for your distribution
pacman -Sy git neovim nodejs npm typescript-language-server

# Check if we have Neovim v0.11 or newer
nvim --version
2. Get a Node.js/Typescript project for testing
To be able to test, we need a typescript project. Any project will do, so if you don’t have a project at hand, fetch some open source one, such as the old microsoft/TypeScript-Node-Starter.
1
2
3
git clone https://github.com/microsoft/TypeScript-Node-Starter.git typescript-project
cd typescript-project
npm install
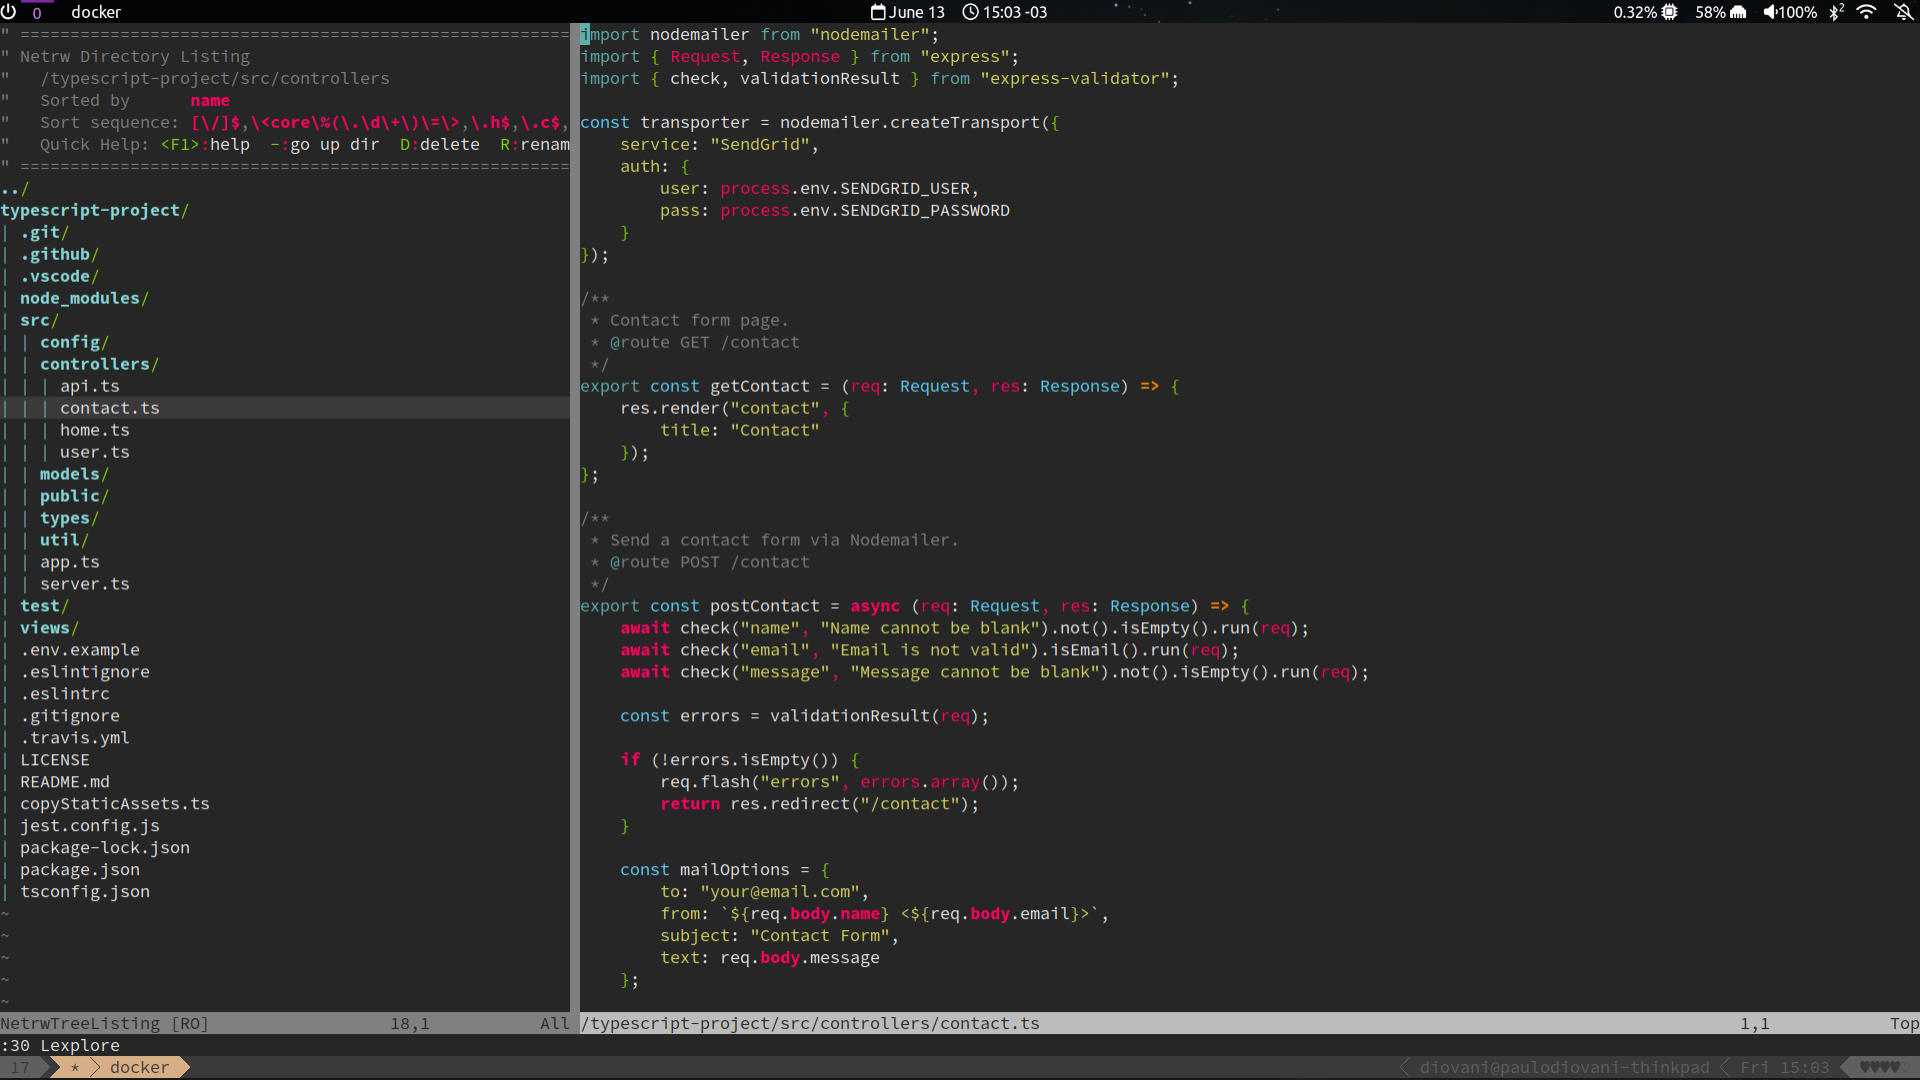
Feel free to check the project.
1
2
3
nvim
# in Neovim, open Netrw
:30 Lexplore

3. Use a different color scheme
Although not necessary, you might want to select a different color scheme for a better look. Neovim includes some by default, you can use one of them or install a different one.
Create a file at ~/.config/nvim/init.lua and include these lines.
1
2
3
4
-- Neovim config

-- Set colorscheme
vim.cmd [[colorscheme unokai]]
4. Configure and initialize the LSP Client
Now, add these lines in the ~/.config/nvim/init.lua.
1
2
3
4
5
6
7
8
9
10
11
12
13
14
15
-- Configure LSP clients

-- Set default root markers for all clients
vim.lsp.config('*', {
  root_markers = { '.git' },
})

-- Set configuration for typescript language server
vim.lsp.config('ts_ls', {
  cmd = { 'typescript-language-server', '--stdio' },
  filetypes = { 'javascript', 'javascriptreact', 'typescript', 'typescriptreact' },
})

-- Enable Typescript Language Server
vim.lsp.enable('ts_ls')
To view other configuration options, check :help lsp-config.
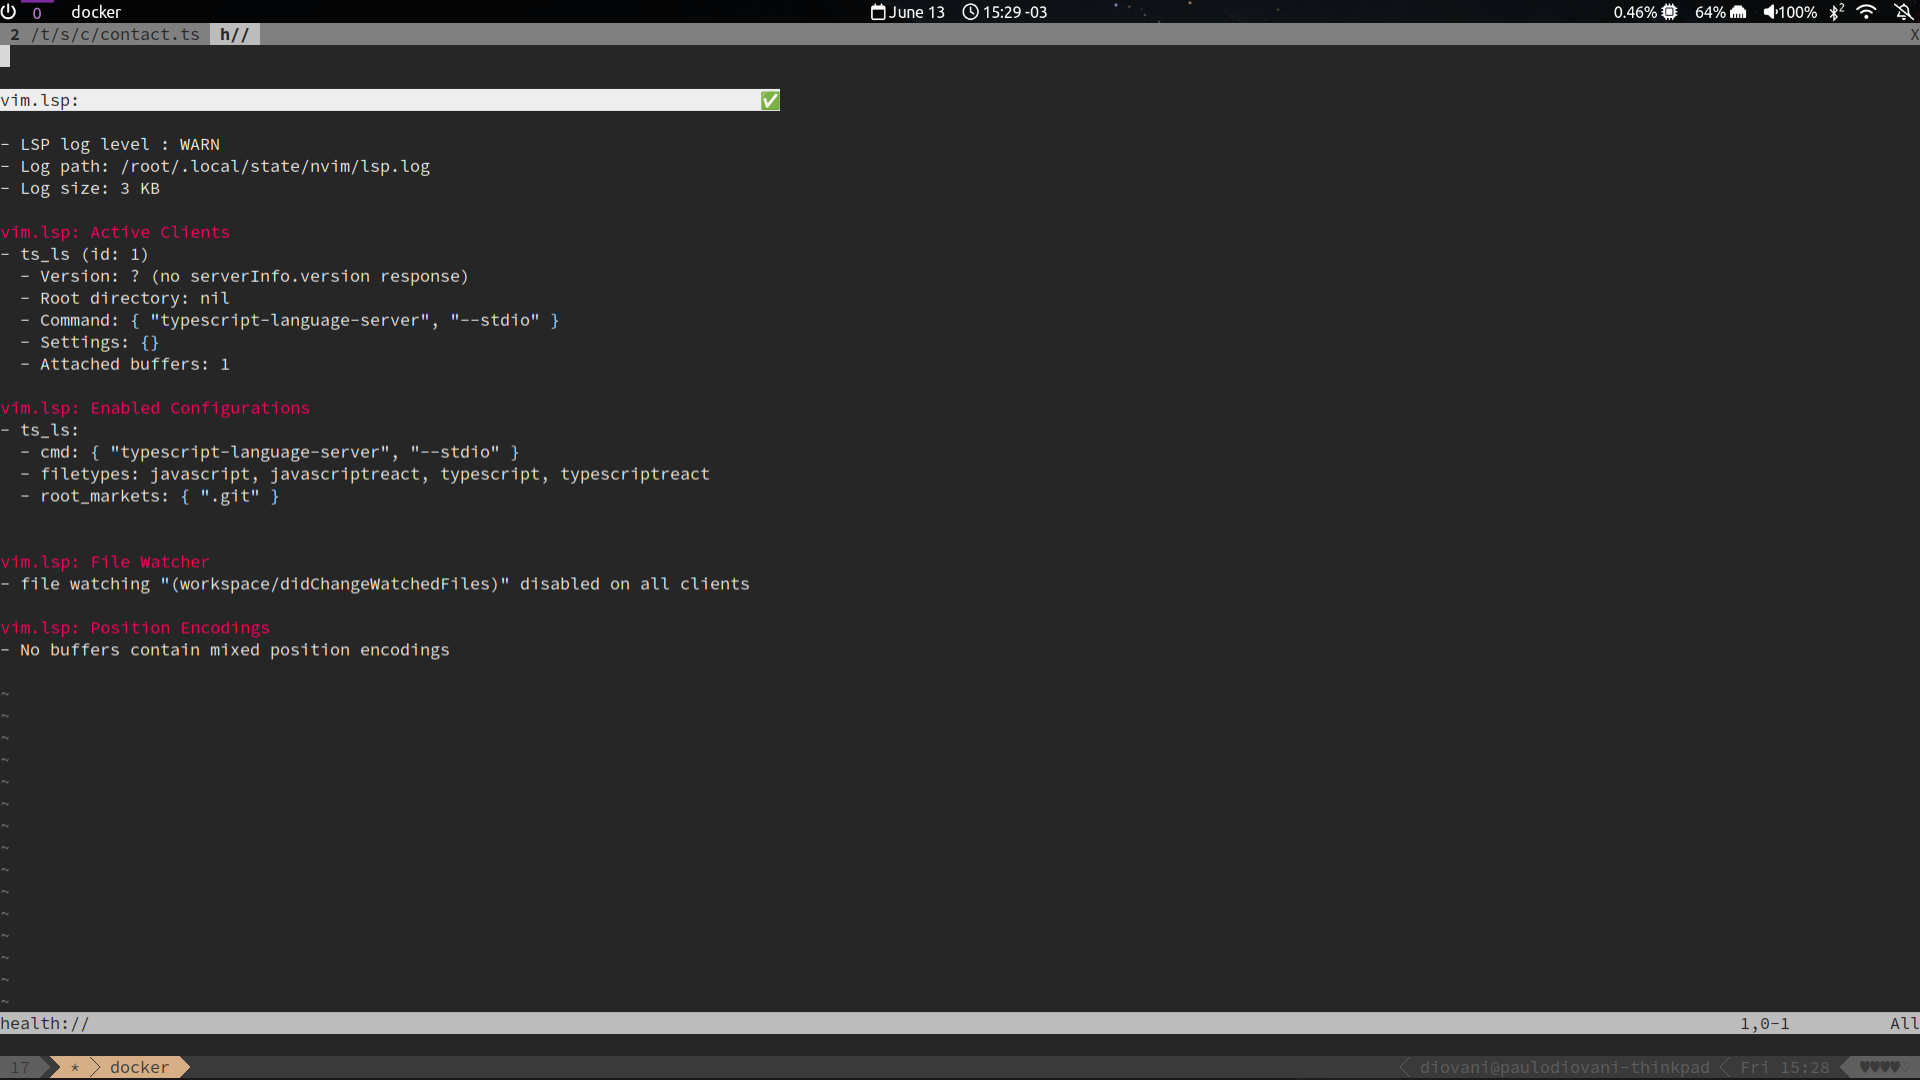
Restart your Neovim and run :checkhealth vim.lsp to confirm it is active.
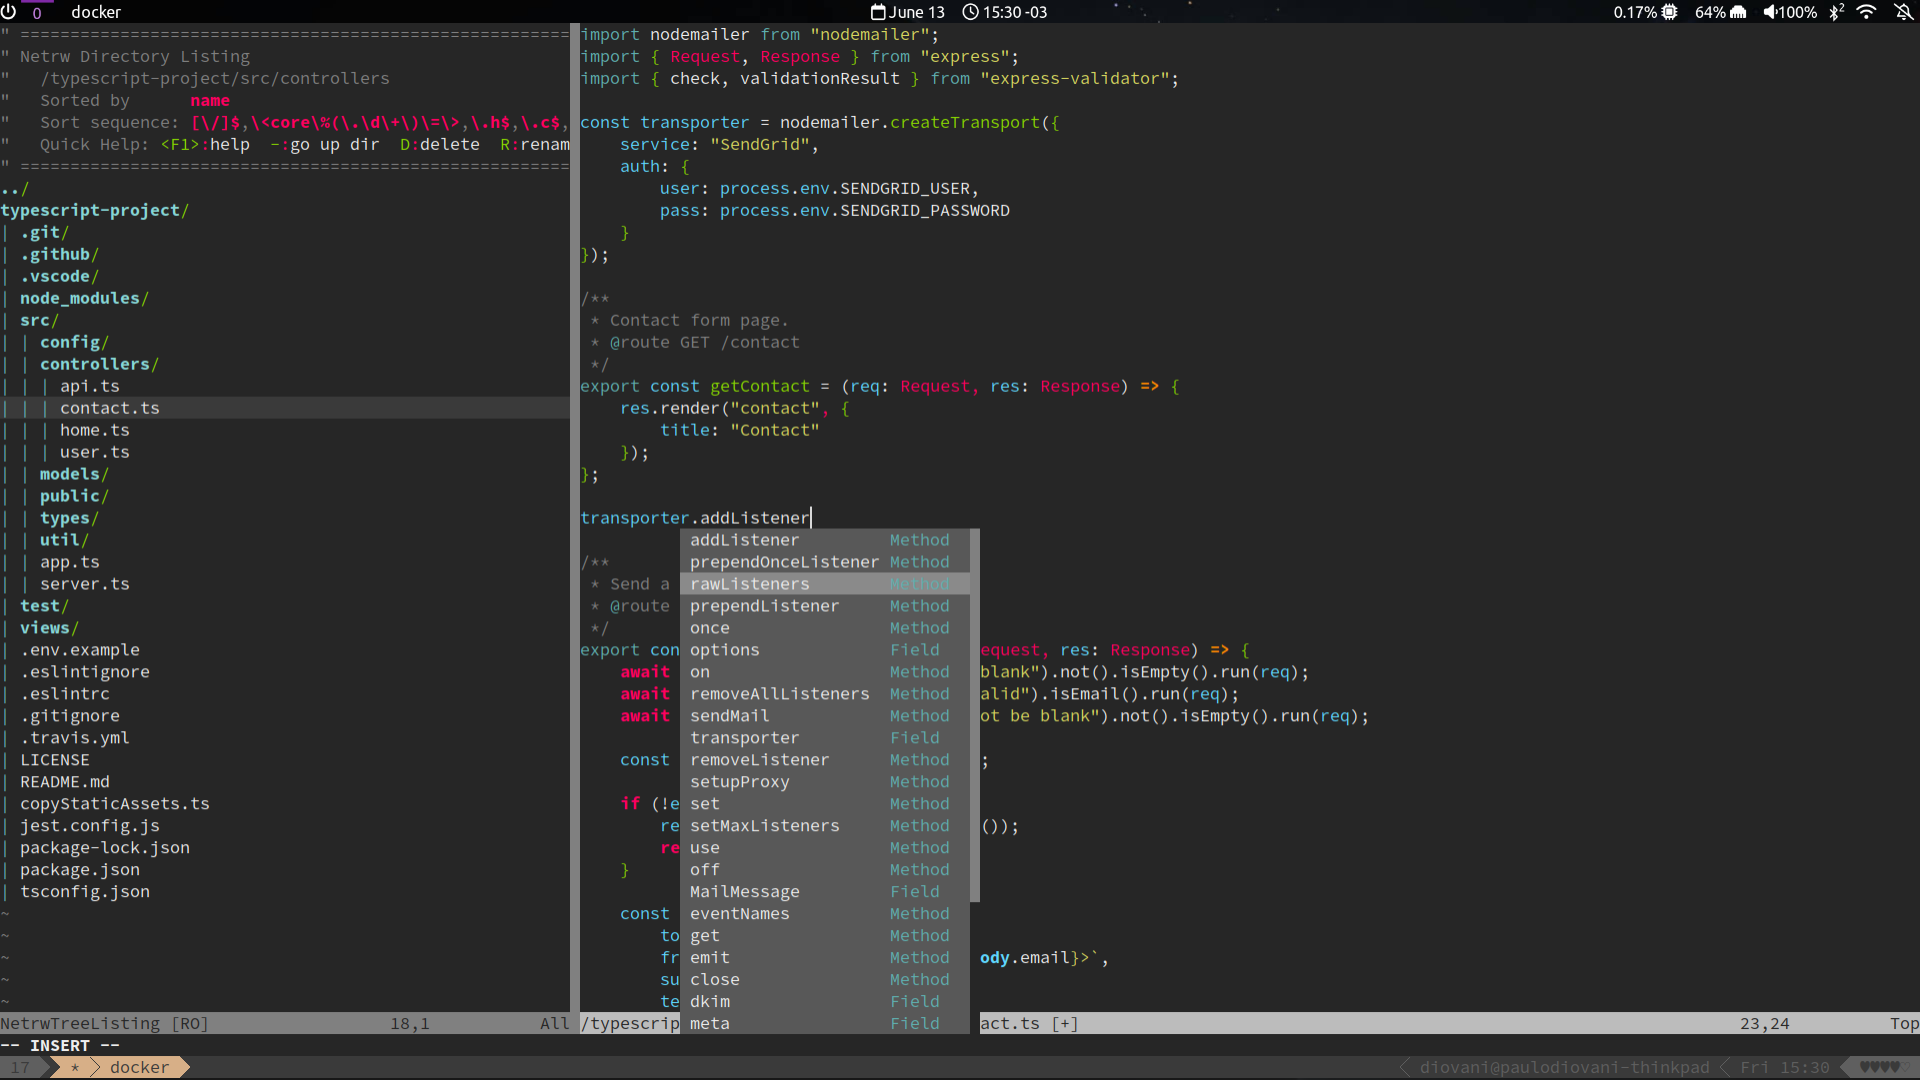
5. Usage
Neovim LSP includes some mappings by default.
- Hover
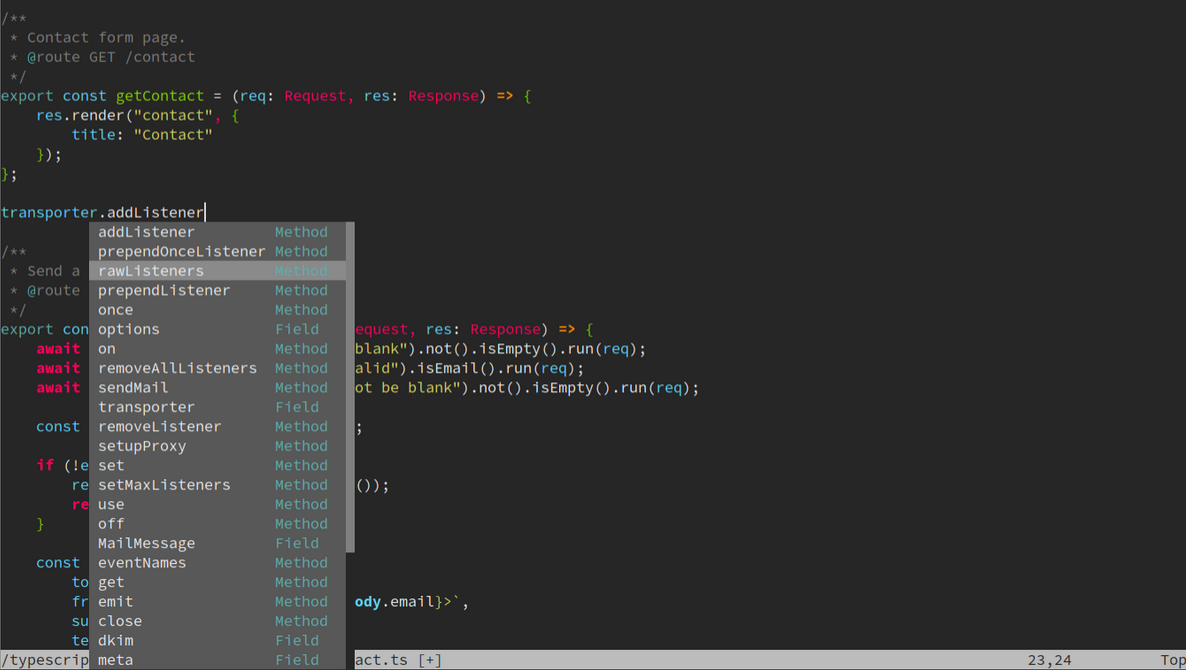
K - Autocomplete (omnifunc)
ctrl+x ctrl+o - Code actions
gra
Check other default mappings with :help lsp-defaults.
You might want to create some extra mappings of your own, I have these, for example:
1
2
3
" use ctrl+space for code completion with omni function
inoremap <C-Space> <C-x><C-o>
inoremap <C-@> <C-x><C-o>
1
2
vim.keymap.set("n", "gD", vim.lsp.buf.definition, { desc = "LSP: Go to definition" })
vim.keymap.set("n", "grt", vim.lsp.buf.type_definition, { desc = "LSP: Type Definition" })
Extra plugins and configurations
This is all that you really need to start using LSP with Neovim 0.11, without any extra plugins.
However, some plugins might be really useful to help set up or configure LSP clients. Here are some of them, with a brief explanation.
- nvim-lspconfig is still a good choice, as it provides default configuration for several LSP Clients.
- mason.nvim and mason-lspconfig.nvim allows installing and configuring Language Server from within Neovim.
- nvim-cmp and nvim-cmp-lsp provides extra completion features with a better UI.
- fzf-lua or telescope.nvim can use custom pickers for code actions or other selectable options.
Conclusion
The intention of this article is to both show how Neovim 0.11 can use Language Server without any extra plugins, and to provide a concise way to set up LSP clients, allowing users to either start from scratch or migrate their old setups without digging into specific migration guides.
However, if you have an old setup that still works, think twice before migrating. Built-in Neovim LSP might have a simpler setup or even be faster, but it is not a required upgrade as long as alternative plugins are not deprecated.